Cabinet Installers
While our primary business is building furniture-grade custom cabinetry, we also offer cabinetry installation to certain homeowners who have purchased or plan to purchase pre-fabricated cabinets from a retailer. If you have already ordered cabinets, we will be happy to evaluate your design for accuracy and provide an installation quote if we are able to accept the project. If you have not finalized your cabinet purchase, please have us evaluate the design prior to ordering.
Please email your floor plans, elevations and complete order list to woodenconcepts@aol.com. While we do not need to see prices, having the list of all items ordered is necessary in order to provide an accurate quote.
How do we decide if we will accept a project?
Much of this depends on what phase you are in.
If you are still in the design phase, it is likely that we will accept your project. We will go over any existing design you may have, or you can take advantage of our kitchen design service. If you have an existing design, we will check it for accuracy. We will also work with you to ensure that your cabinet order is accurate before finalizing your purchase.
If your cabinets have already been purchased, it will depend on the accuracy of the design and the materials ordered. If there is a problem with the design that cannot be remedied on-site, we will not accept the install. We will explain to you what the problem is and why we cannot accept the project.
Timing is also a factor in our acceptance of installs. The same craftsmen that design and build our furniture grade cabinetry do all of our installations. If we design your kitchen or approve your design before you order, we will have enough time to schedule your install around the cabinet shop schedule. If your cabinets are arriving soon or have already been delivered, please contact us to inquire about any current openings in our schedule.
How should you choose a cabinet installer?
What's So Different Today?
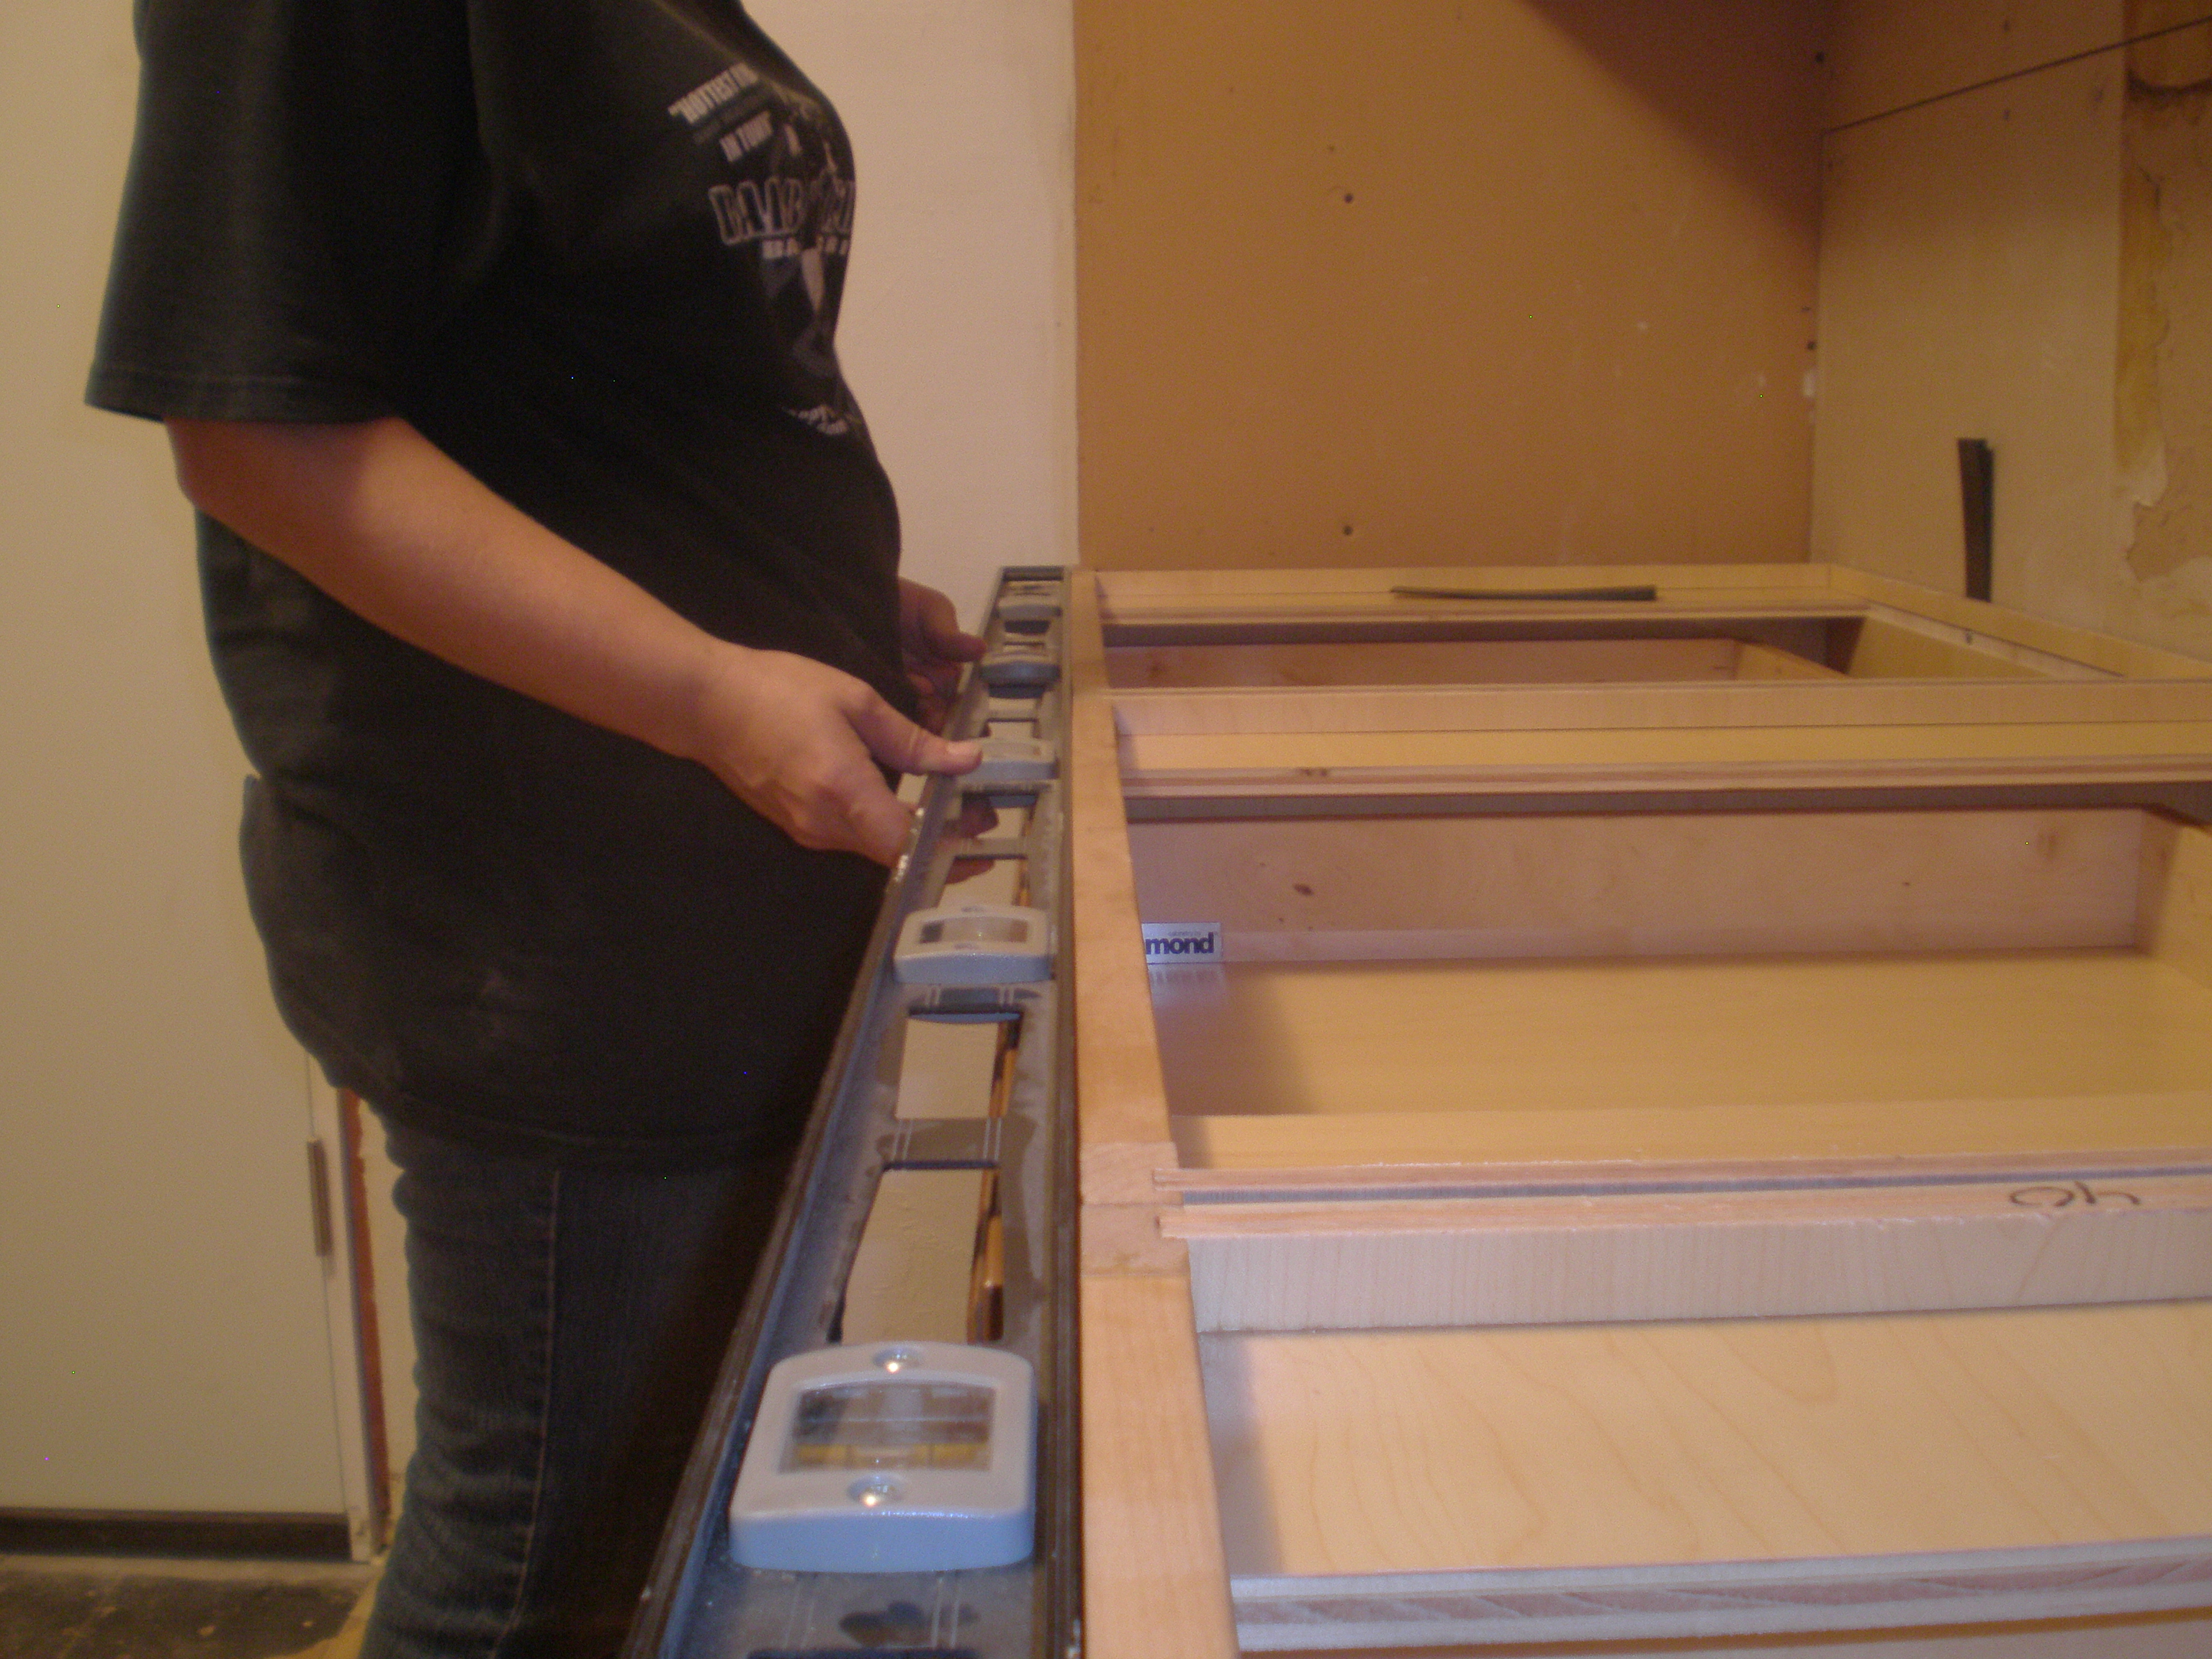
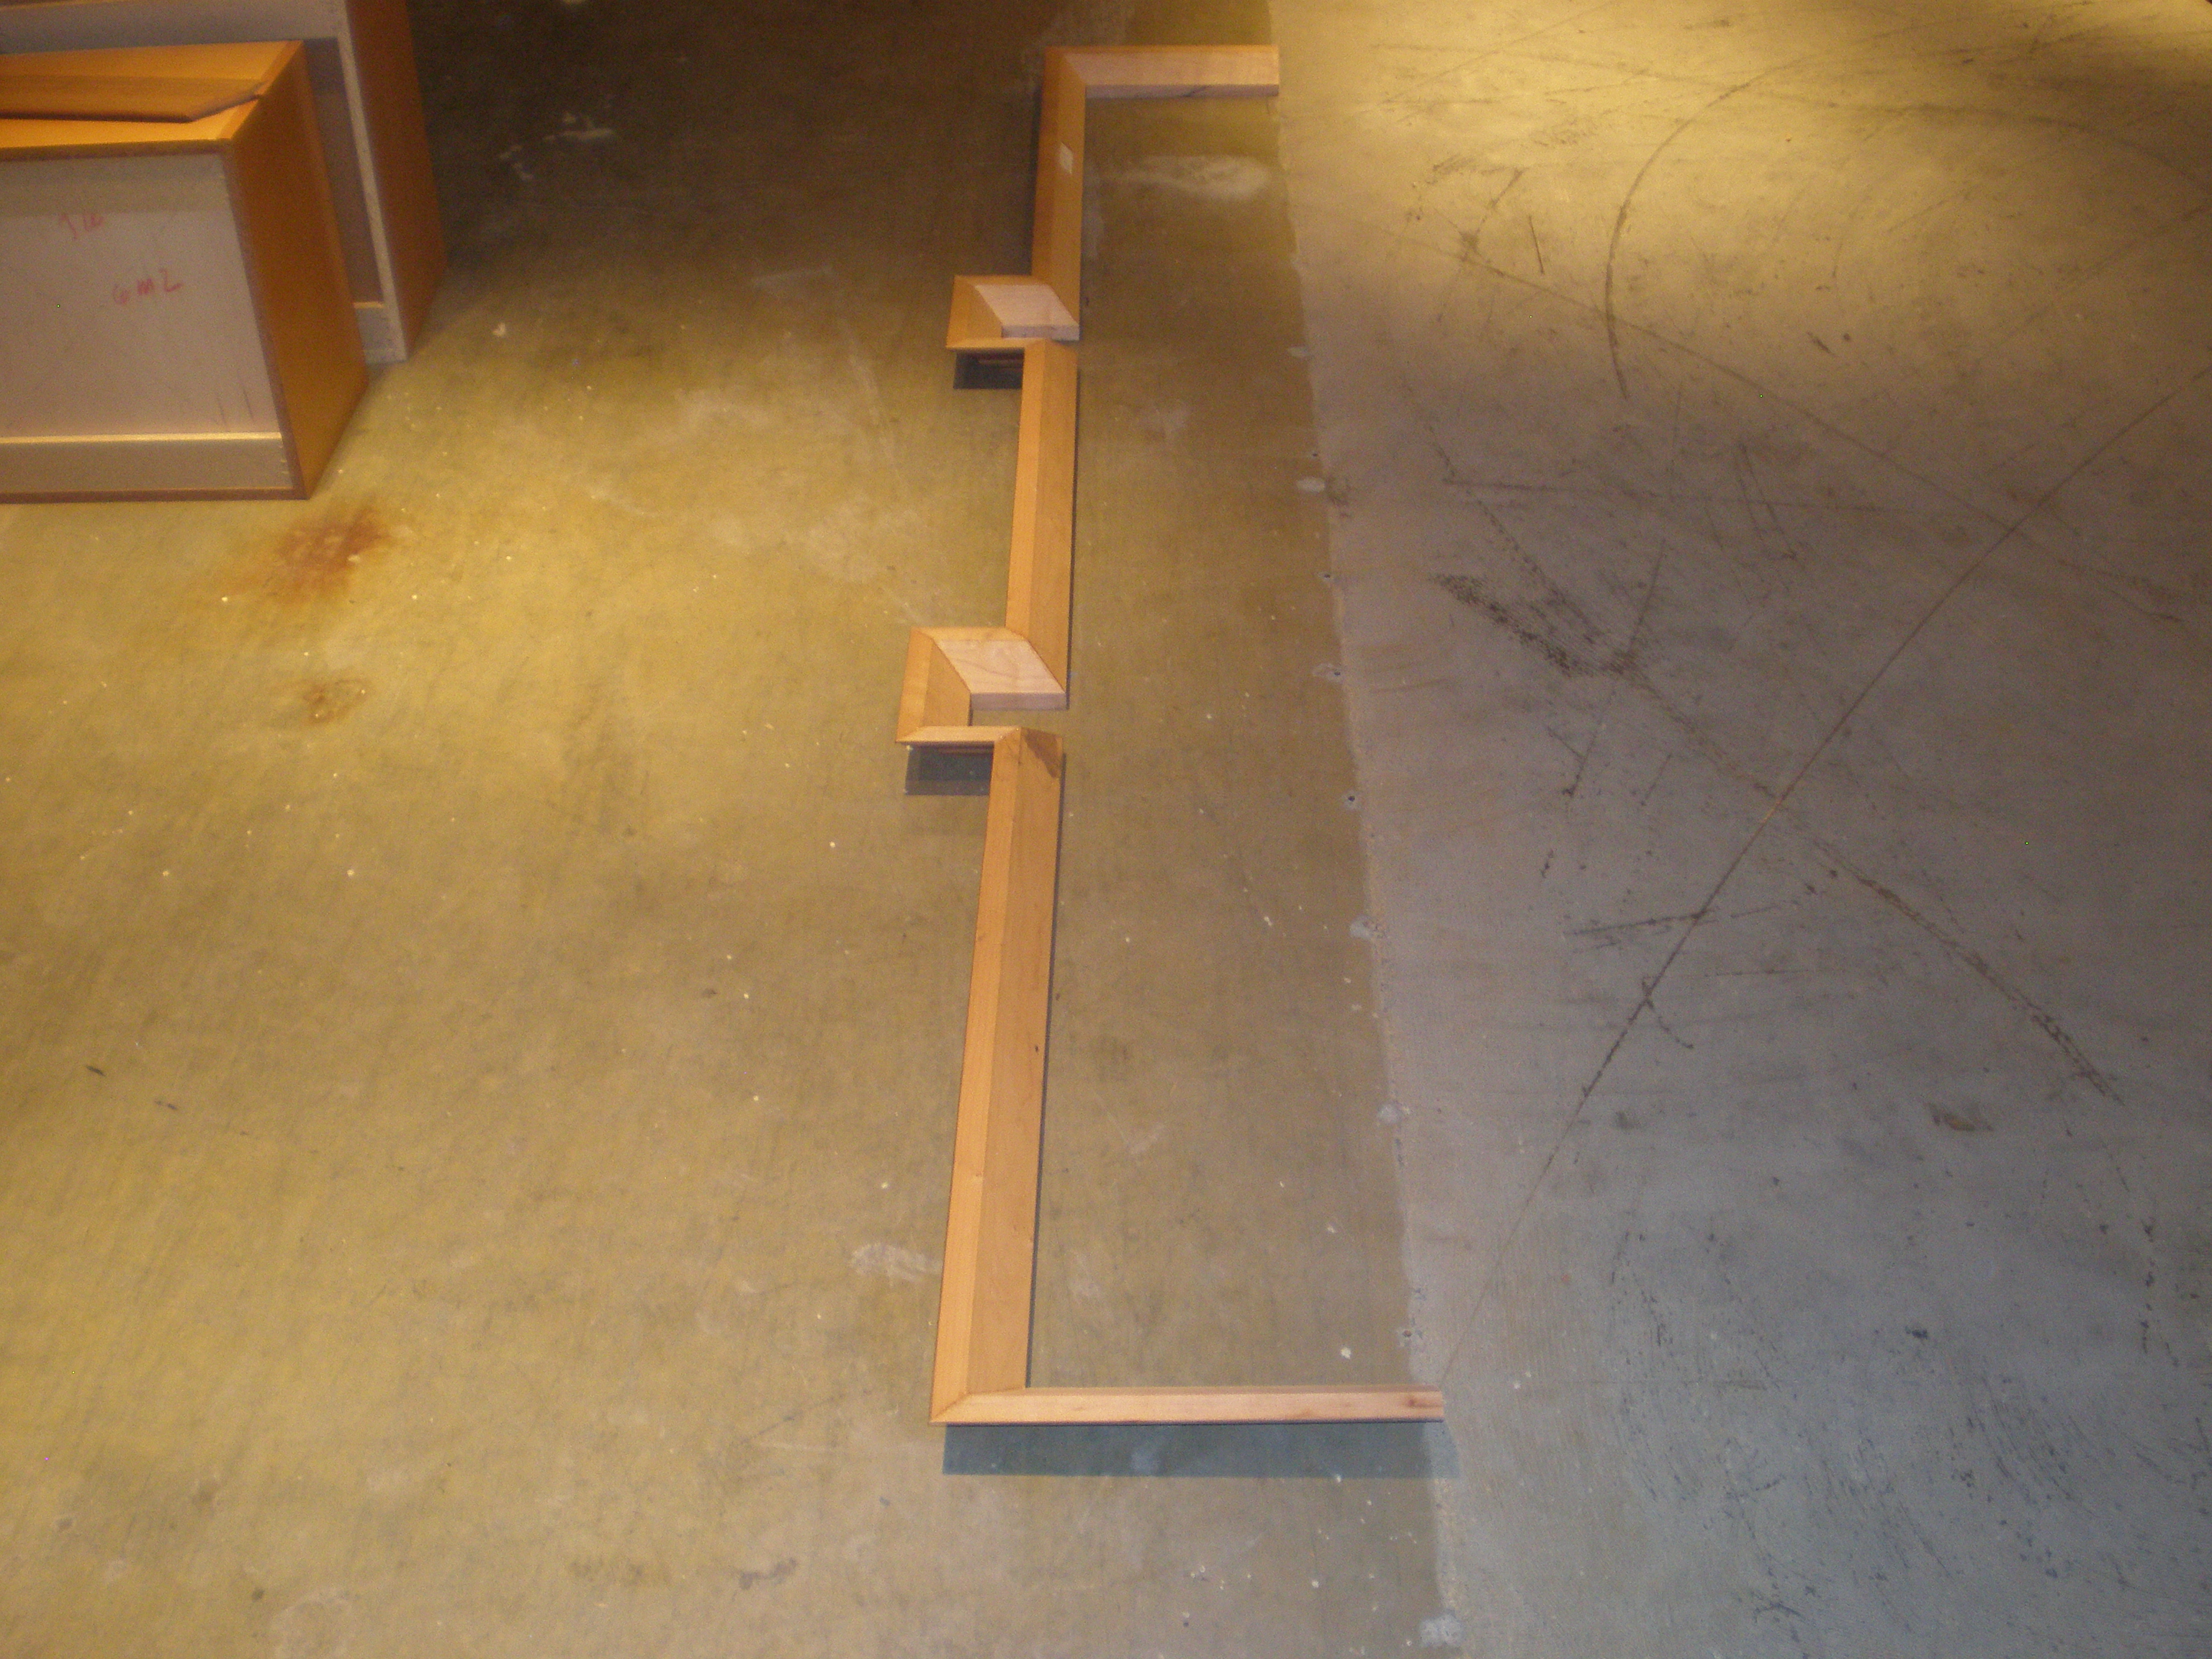
Nothing. Walls have always been out of level and bowed studs have always been used in all phases of construction. This has never been a problem for actual cabinet installers. This is why we come to your house with 10 packs of shims - just in case. The entire art of hanging cabinets correctly is that no matter how far out of level the walls and floor may be, the cabinets should still be perfect. Getting cabinets level with your floor is actually the easiest part of installing the cabinets. This is the only level that most cabinet installers will show you - and even then they will usually choose their spots carefully. The biggest trick for a perfect cabinet installation is to get the cabinets level with the wall (vertically) while they are also level with the floor (horizontally) and keeping them in a perfectly level plane across the cabinet frames. This level plane is what the countertop installer cares the most about. If your wall is not straight and your cabinets follow your wall instead of being shimmed to make a level plane, it can't be hidden with the countertop. At some places your countertop will extend past your drawer fronts further than other places. If your cabinet installer took this into consideration when correctly hanging your cabinets, the countertop will extend from your cabinets with the same overhang all the way down the wall. The photos below show a cabinet install with very poor wall conditions. By shimming properly, we were able to maintain a perfectly level plane for the countertop.
Fillers. The four letter word in cabinetry.
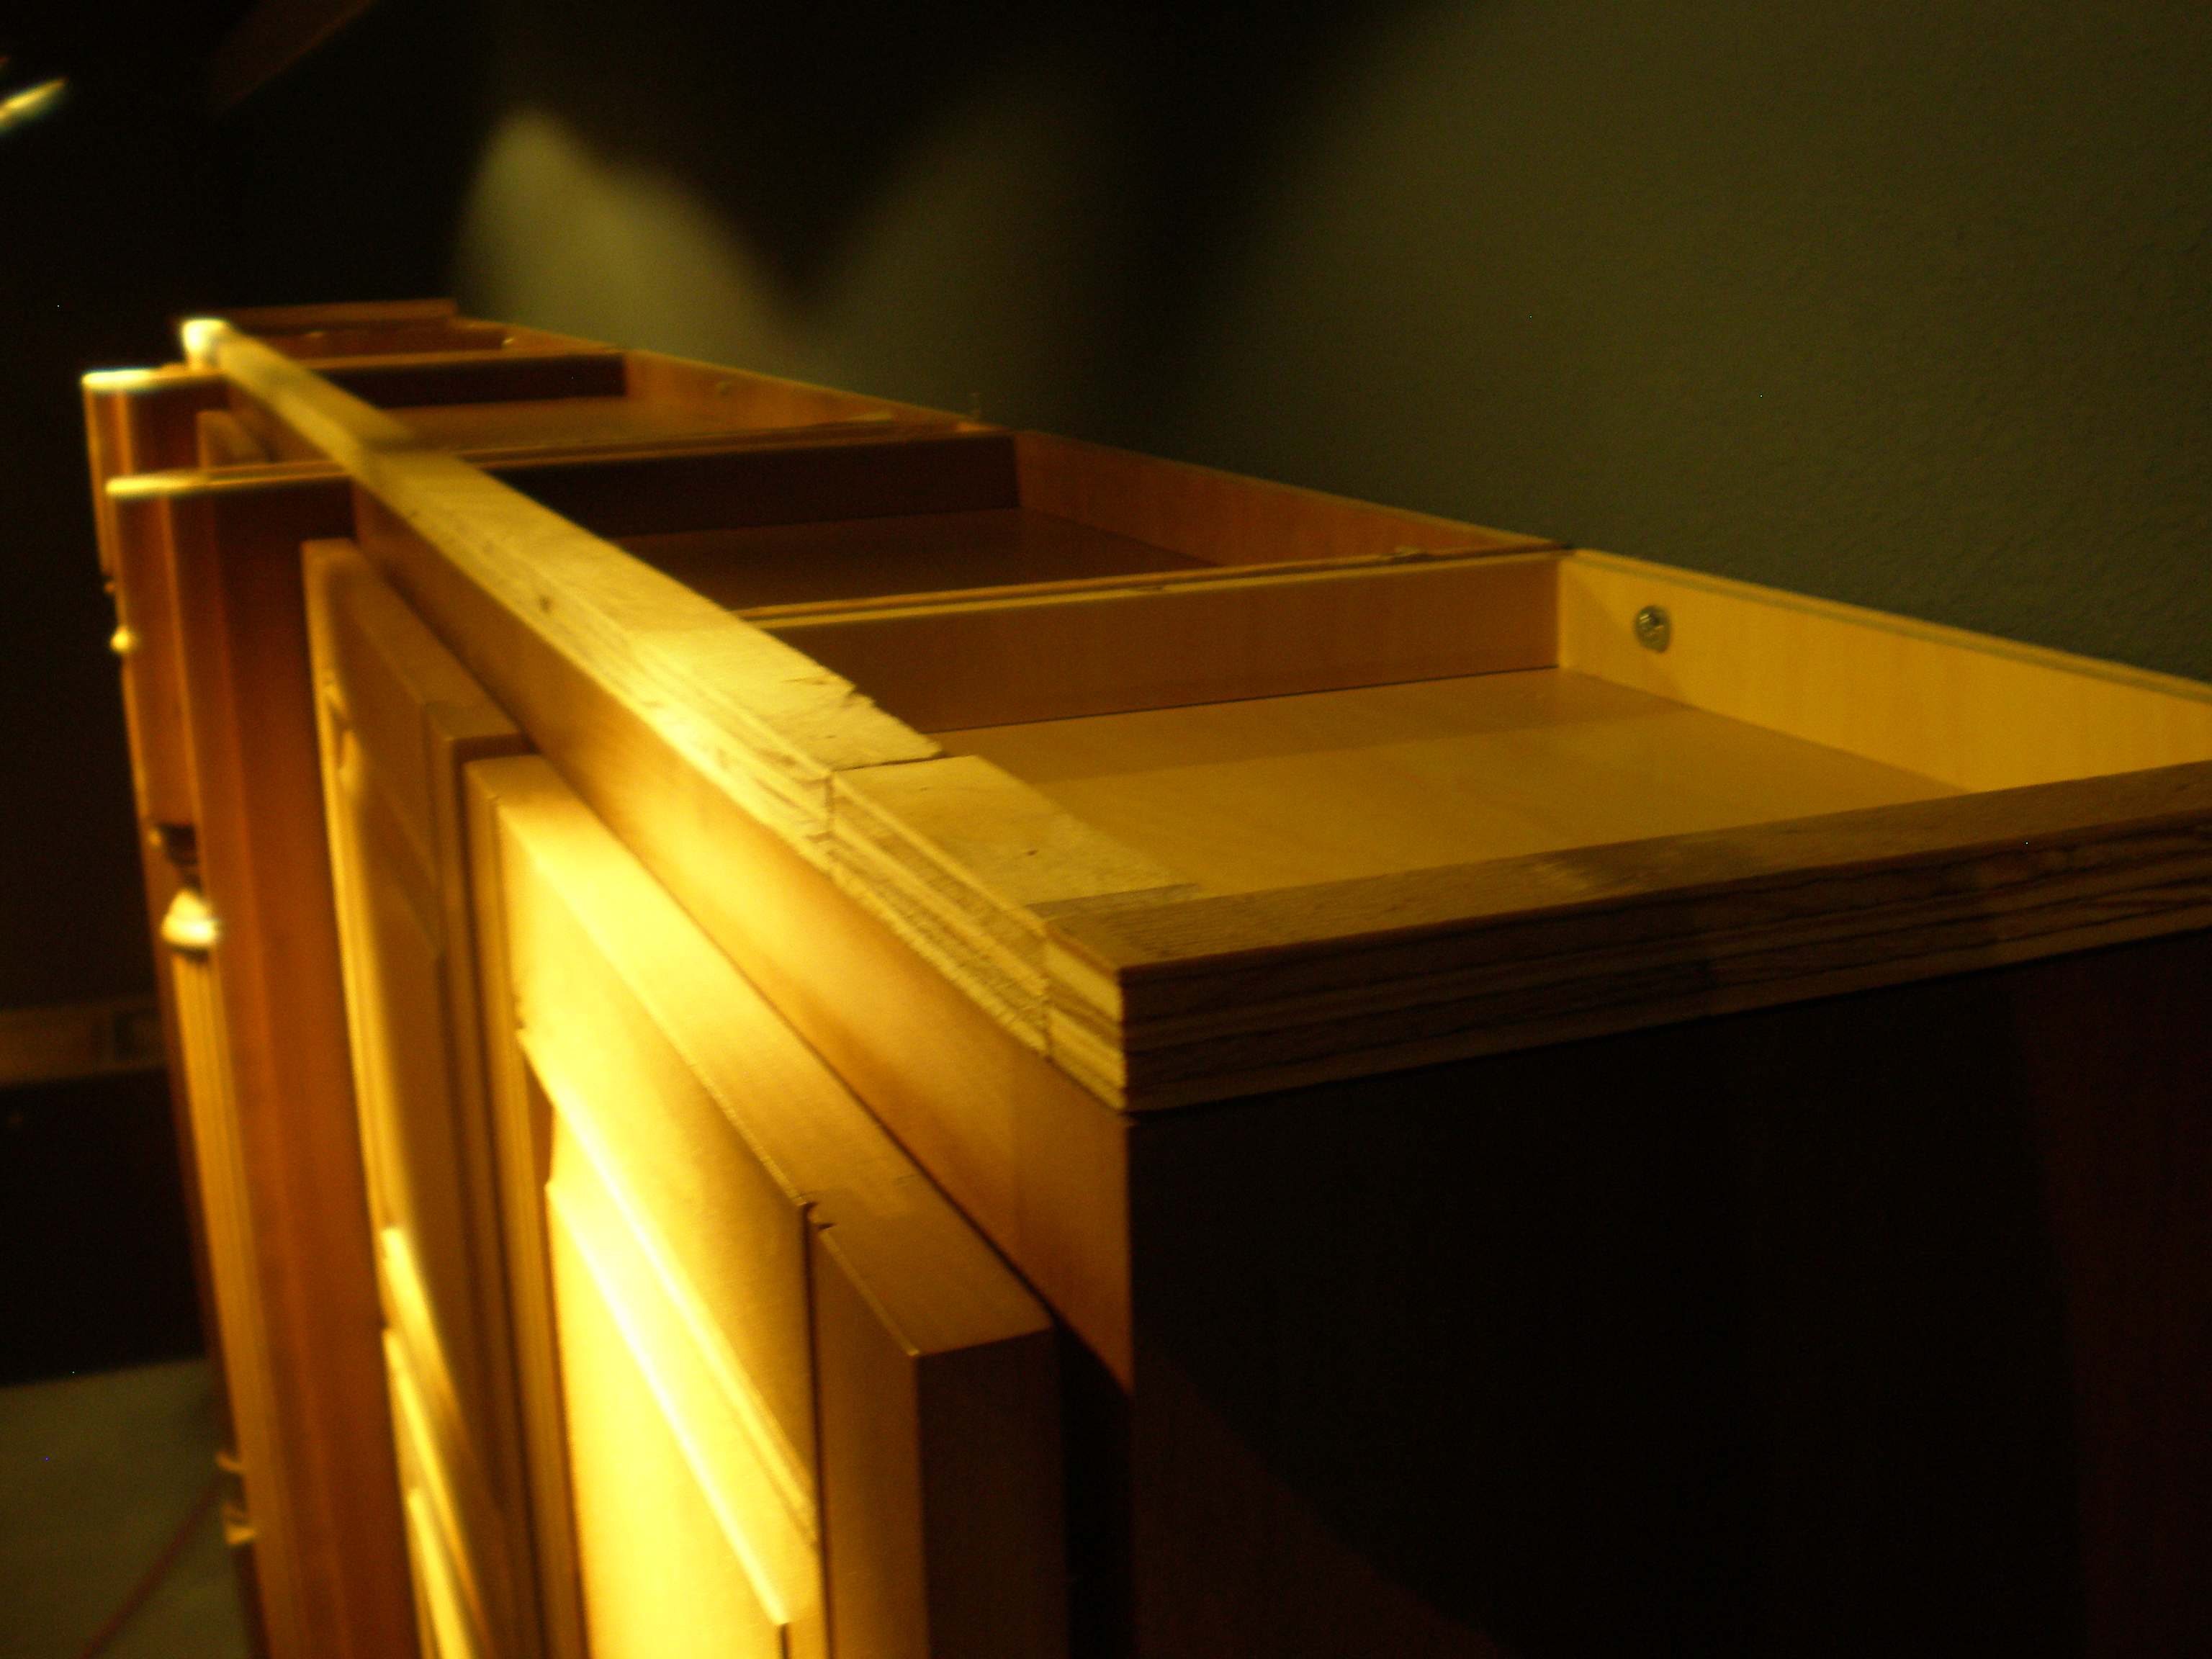
When you look at the picture above on the left can you see both of the fillers? The cabinet on the left is a 27" wide wall angle cabinet which means it is 15" deep. It is also a staggered height cabinet. When a standard, 12" deep, cabinet with full overlay doors butts up to a deeper cabinet you must add a filler or risk the door rubbing the finish off (which also voids the warranty). This doesn't mean you need to add a full 3" filler that will stand out like a sore thumb but you do have to add something. We add a 5/8" filler to the 12" deep cabinet and hide the seam with a piece of 3/4" scribe. Depending on how large the crown is compared to how much deeper the adjacent cabinet is determines how many options you have for your crown. The crown in the picture above on the left would have stuck out past the 15" deep cabinet by about 1/4". So we chose to give the crown a double return. The problem with this, is that the top of the cabinet is just above the top of the door on a full overlay door style. We had to add another filler to the top of the cabinet so that when the crown returns it appears to return into the cabinet. This also creates an interesting cut at the top of the scribe moulding that is hiding the filler. Some of the best cuts are the ones that are unnoticed, anything less than perfect here draws the wrong type of attention.


Copyright 2002 Wooden Concepts: Custom Cabinets and Kitchen Design. All Rights Reserved.
Email Us
This approach is necessary for more than just the appearance of your cabinets and countertop: cabinets are built to square and are meant to remain square when installed. If a cabinet installer simply follows your wall contour he will undoubtedly rack or twist your cabinets out of square which will lead to your doors and drawers not closing properly.
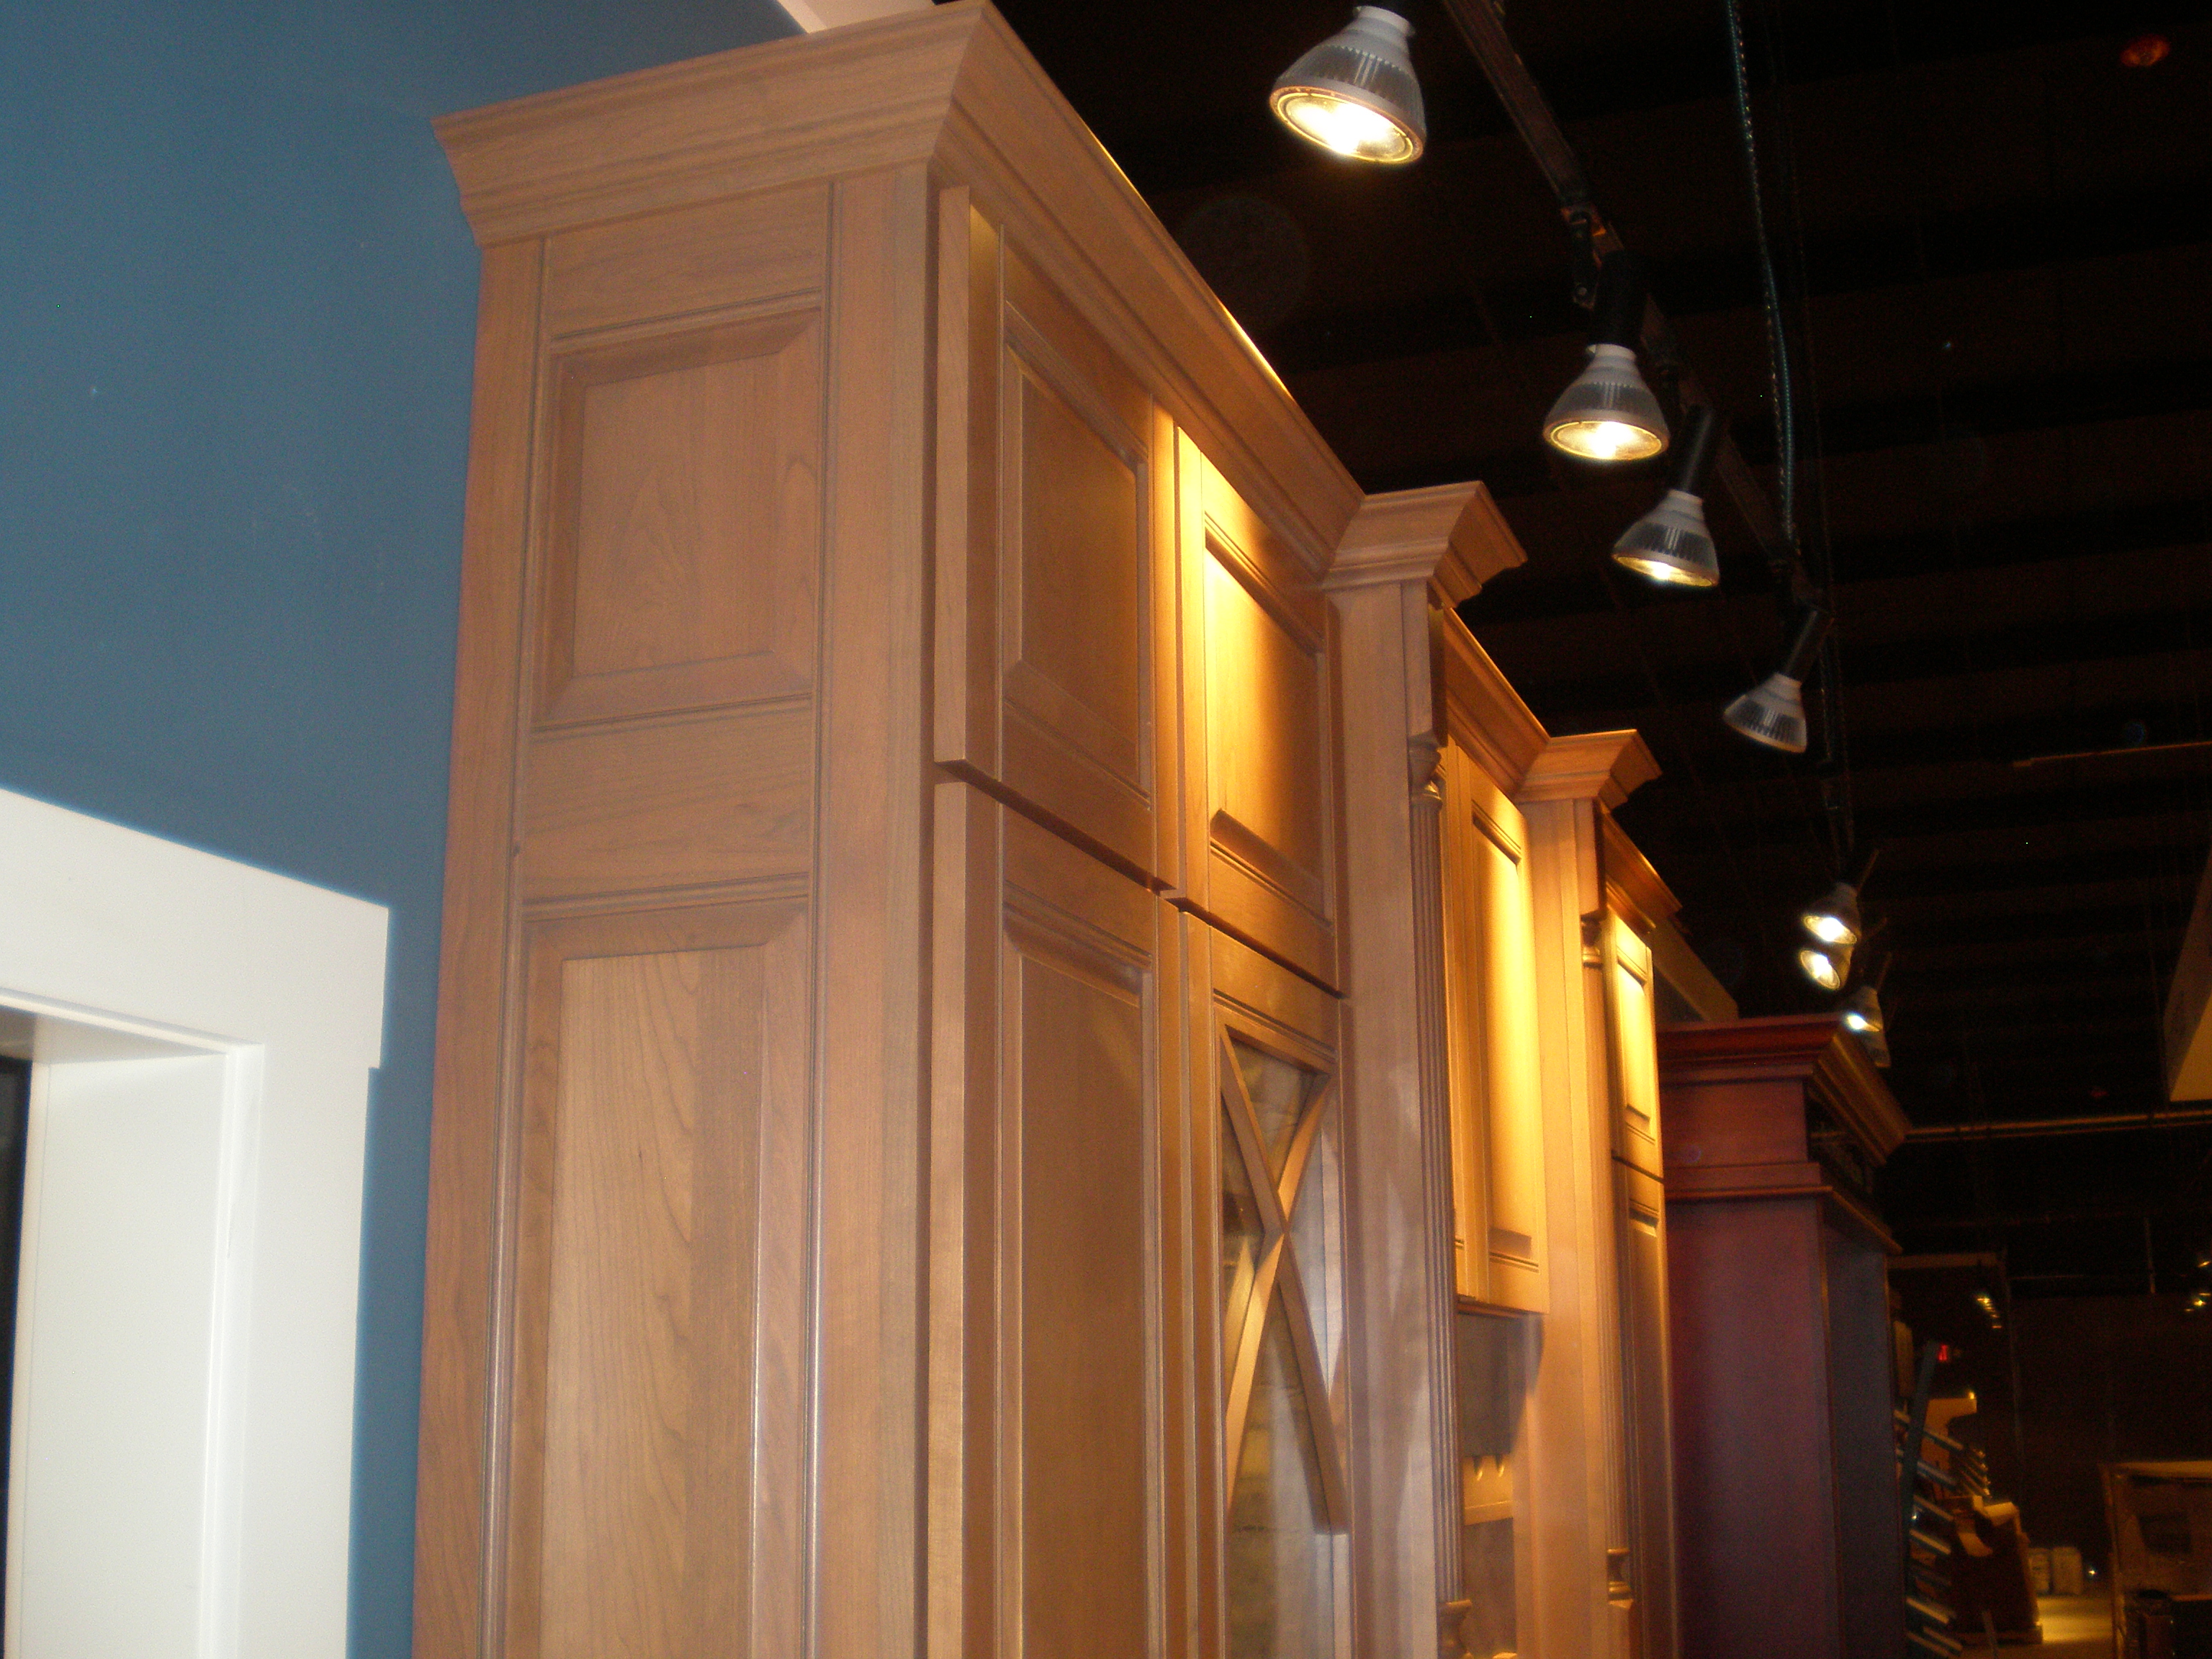
Trim has also not changed except for the fact fewer and fewer carpenters actually know how to correctly apply it. The majority of trim carpenters today are anything but craftsmen. They use base moulding for door casing and they use window casing for chair rail. Window sills are normally trimmed with a small crown moulding underneath but todays carpenters use a window casing with an angle on each end without even a return cut. They cut just as many corners on their cabinet trims as well. Cabinet doors are designed to have the same amount of reveal around the entire door or the amount of the faceframe that is visible around the door. To keep this even reveal for the crown moulding requires the cabinet installer to add what is called blocking to the top of the cabinets. Blocking is essentially a nailer for the crown moulding. The crown moulding should only be an eighth of an inch to a quarter of an inch below the top of the frame to keep the reveal around the doors the same. The idea is to only hide the seam of the top of the cabinets with the crown moulding. Like in the picture above, if you shim your upper cabinets correctly and keep a level plane across the face frames, this is easily achievable. The blocking also allows you to add hot melt glue behind your crown moulding giving it far more support and requiring far less nails. Cabinet installers today usually don't take these extra steps. They simply lower their crown moulding further down the face frame leaving a much different reveal around your cabinet doors. The pictures below show cabinet blocking and crown moulding properly installed to upper cabinets.

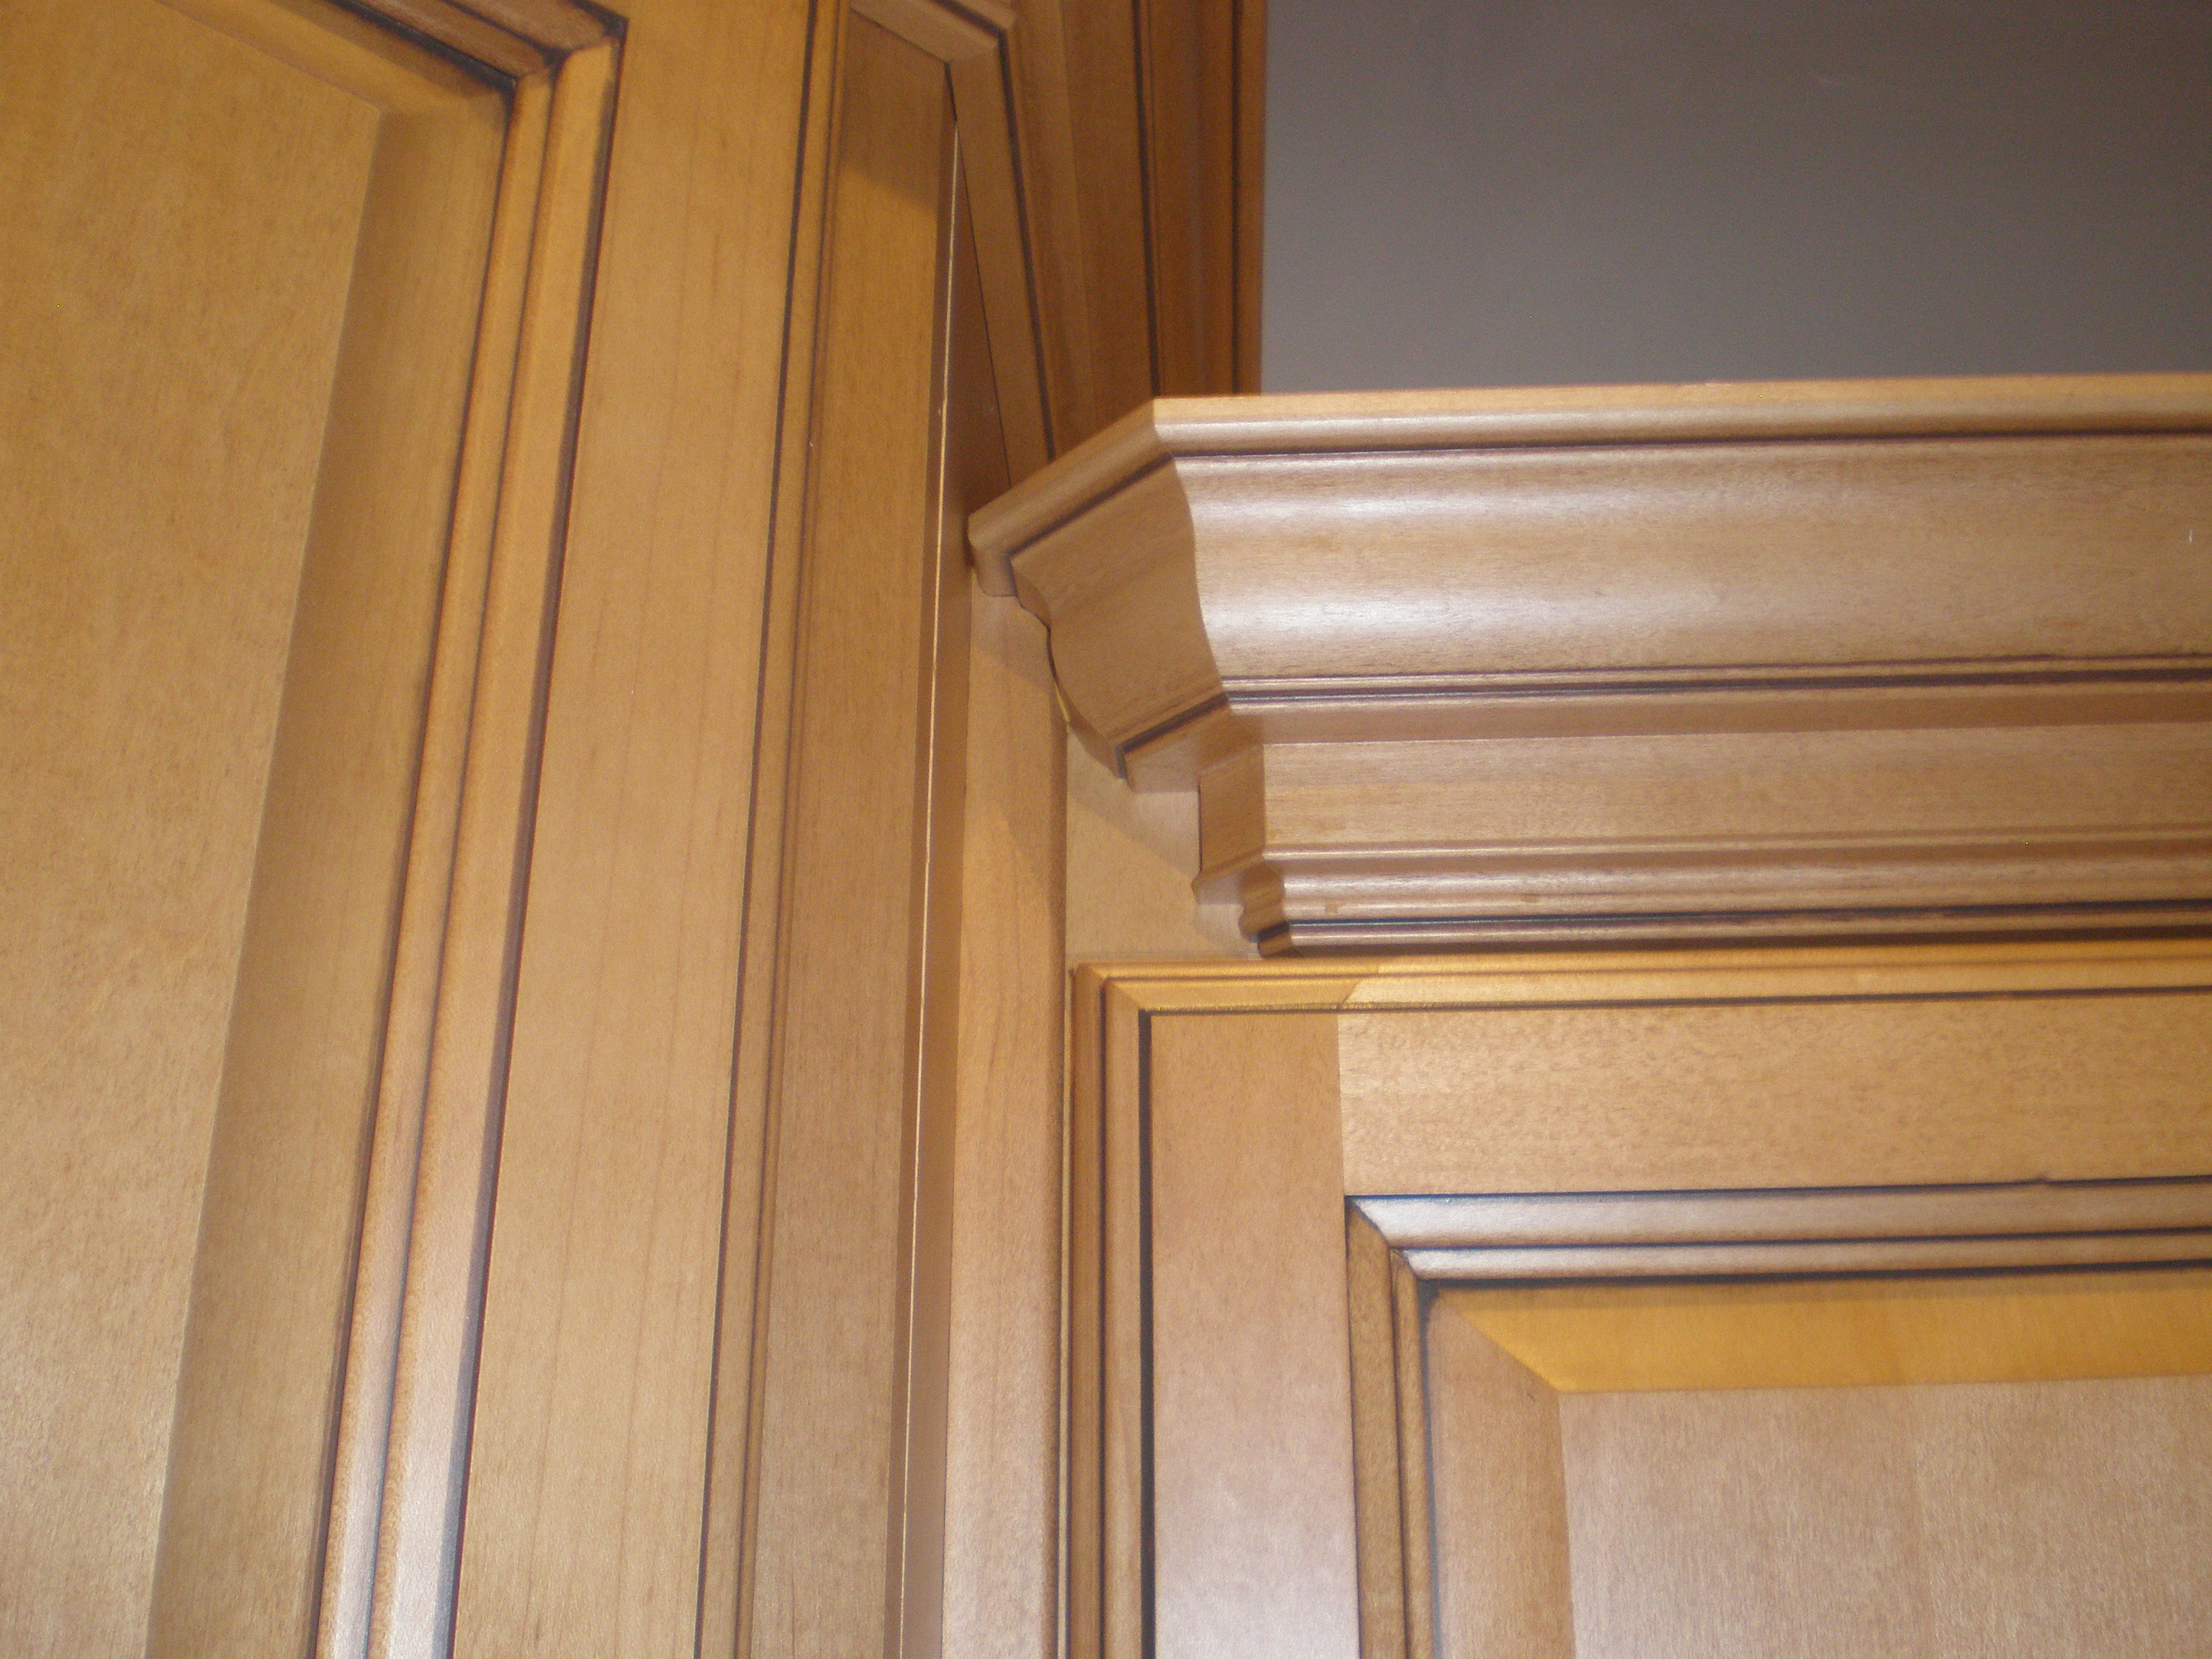
When cabinets are properly shimmed, level and square, the crown moulding can then be perfectly applied. If the cabinets are incorrectly installed the trim is incredibly difficult to install. If a skilled cabinet installer has taken the time to make sure that his cabinets are correctly installed, the trim will show off all of his hard work up to this point. Notice the lack of nail holes in the pictures above and below. By taking the extra steps to ensure the cabinets were installed correctly and adding blocking we are able to cut the miters perfectly. Perfect miters do not need to be twisted or forced to fit, they can be glued together by an industrial strength glue made for crown moulding applications. We cut and glue our crown moulding as one continuous piece and then only need a few nails to hold it into place until we can use a hot melt glue to glue the crown moulding to the blocking. This is far stronger than using twenty or thirty nails to hold the crown moulding on, we actually tested this in our shop. This has also allowed us to use crown applications like the double crown returns below and the staggered crown applications above without any nails. The crown moulding below on the right is the same crown moulding used in the pictures above and it doesn't have one single nail in it.
Wooden Concepts
Wooden Concepts